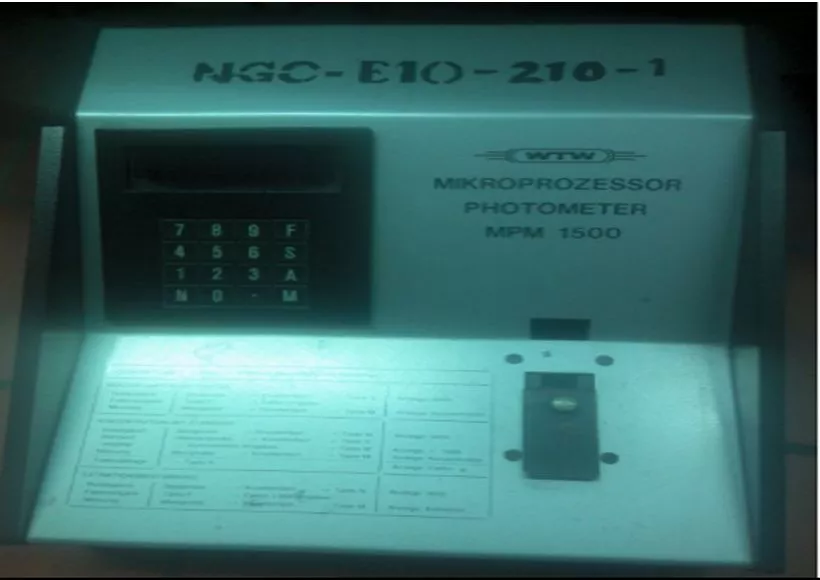
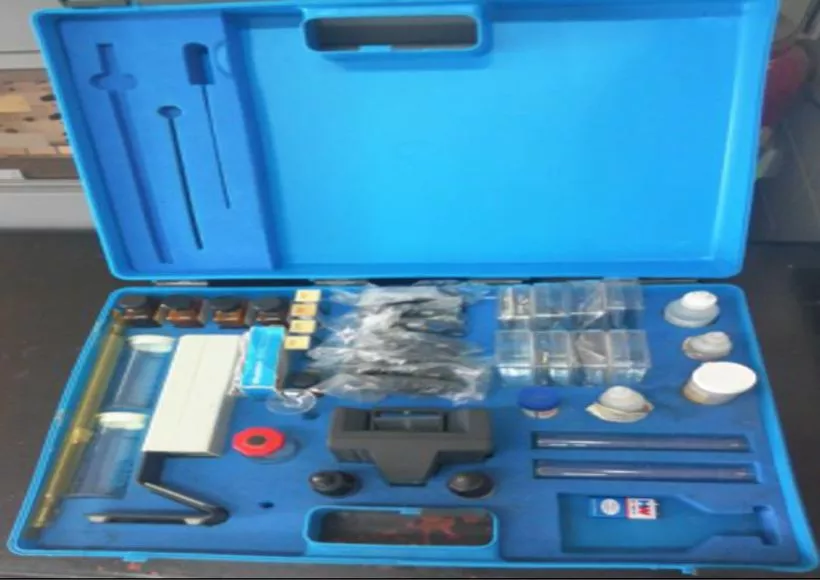
WISSENSCHAFTLICH-TECHNISCHE WERKSTATTEN (WTW) MIKROPROZESSOR PHOTOMETER MPM 1500
[ Water Analysis 2 ] A photometer, generally, is an instrument that measures light intensity or optical properties of solutions or surfaces.

IRON (Fe)
Method: 1,10-phenanthroline
Reagents: Reagent set for Iron E 2-1000, order no. 250335 Including 1 bottle Fe 1, 1 bottle Fe 2, 1 bottle Fe 3, 1 bottle Fe 4, 1 measuring spoon
Accessories: 1 optical filter IL 492, 2 flasks, volumetric MK 25, 1 automatic pipet KHP 1000, 1 syringe SPR 20, 2 sample cells REK 20
Ranges and factors:
| Result | Range | Factor |
| Iron Fe mg/l | 0.05-7.5 | 03.24 |
| Iron(iii)oxide mg/l | 0.07-11 | 04.63 |
| Iron Fe mol/l | 0.001-0.13 | 0.058 |
Procedure:
- Pour 20ml of test sample into volumetric flasks MK 25
- Add 1 ml Fe 1 and mix
- Measure 1 level measuring spoon Fe2, mix
- Add 1 ml Fe 3, mix
- Add 1 ml Fe 4, mix
- Fill up with distilled water to 25ml mark, and mix again
- After 5 minutes fill one clean sample cell REK 20 up to ¾ with the test sample and the other with blank value sample (distilled water)
- However, insert optical filter IL 492 into the filter holder, mark must be visible to the operator
- Insert the sample cell with a blank value sample into the cell holder, press the N button.
- Press the F button, enter factor
- Insert the sample cell with a test sample into the cell holder, press the M button
- In conclusion, the concentration of the test sample is shown on the digital display accord
Note: Only dissolved iron can be determined by this method. Insoluble iron compounds must be filtered out and dissolved with hydrochloride acid. The total iron is the sum of the soluble and insoluble iron. Test samples which cannot be analyzed immediately can be stored by adding 2ml sulphuric acid per liter test sample.
COLOUR [ Water Analysis 2 ]
Method: Photometric determination as Hazen Colour (APHA-Platinum-Cobalt-Standard)
Accessories: Filter IL 445, Cuvette 50mm
Ranges and factors: 5-500mg/l Pt (factor 0781)
Procedure:
- Pour test sample and blank value sample (distilled water) into two separate dry cuvettes
- Insert optical filter IL 445 into the filter holder, mark must be visible to the operator
- Place cuvette with blank value sample in photometer and therefore adjust to zero by pressing N
- After that, press the F button, enter factor 0781
- Place the cuvette with a test sample in the photometer and press the M button for the test result
- In conclusion, the color is shown as platinum in mg/l
Note: For instance, the test results for Water Analysis 2 are shown as spectral absorbance coefficient in m-1 the factor is 020.0 [Water Analysis 2].
TURBIDITY [ Water Analysis 2 ]
Method: Photometric determination, based on the turbidity of a formazine standard suspension.
Accessories: Filter IL 620, Cuvette 50mm
Ranges and factors: 1-100TE/F (factor 0124)
Procedure:
1. Pour test sample and blank value sample (distilled water) into two separate dry cuvettes
2. After that, insert optical filter IL 620 into the filter holder, the mark must be visible to the operator
3. Place cuvette with blank value sample in photometer and therefore adjust to zero by pressing N
4. Press the F button, enter factor 0124
5. After that, place cuvette with a test sample in photometer and press the M button for test result
6. Turbidities are shown as Formazine turbidity units in TE/F
Note: In conclusion, for test results for Water Analysis 2 shown as spectral absorbance coefficient in m-1 the factor is 020.0 [Water Analysis 2].
CHLORINE [Water Analysis 2]
Method: Photometric determination of the free and total chlorine with N, N-Diethyl-1,4-phenylenediamine (DPD)
Accessories: Filter IL 540, Cuvette 20mm
Ranges and factors: 0.05-2.00mg/l Cl2 (factor 02.85)
Reagent: Chlorine Mod. C3-1500
Free Chlorine determination Procedure:
- Pour 20ml of the test sample and blank value sample (test sample) into two separate 25ml volumetric flasks
- Add 1 spoon of Cl2 into the test sample and mix
- After that, add 1 ml Cl2 1into the test sample, mix
- Fill up the test sample and blank value with distilled water to 25ml mark, and mix again
- After that, Insert optical filter IL 492 into the filter holder, mark must be visible to the operator
- Immediately place cuvette with blank value sample in photometer and press the N button to adjust to zero
- Press the F button, enter factor 02.85
- After that, Place the cuvette with the test sample in the photometer and press the M button for the test result
- In conclusion, the test result from Water Analysis 2 is shown as free chlorine in mg/l
Total Chlorine determination Procedure:
- Pour 20ml of the test sample and blank value sample (test sample) into two separate 25ml volumetric flasks
- Add 1 spoon of Cl2 2 into the test sample and mix
- Measure 1 ml Cl2 1 into the test sample, mix
- Add 1 tablet Cl2 3 into the test sample, mix
- After that, fill up test sample and blank value with distilled water to 25ml mark, mix again and wait for 3 minutes
- Insert optical filter IL 492 into the filter holder, mark must be visible to the operator
- Immediately place cuvette with blank value sample in photometer and press the N button to adjust to zero
- Press the F button, enter factor 02.85
- After that, place the cuvette with the test sample in the photometer and press the M button for the test result
- In conclusion, test result are shown as total chlorine in mg/l
Note: Generally in Water Analysis 2, the difference between total and free chlorine is combined chlorine. [Water Analysis 2]
LOVIBOND AF355 RAW WATER KIT [Water Analysis 2 ]

NITRATE (NO3): Range 10-100mg/l NO3 using disc 3/142
- Fit disc 3/142 into the comparator.
- Pour sample into two 13.5mm/10ml molded cells to the 10ml mark. Place one cell in the left-hand compartment of the comparator to act as a blank for any inherent color or turbidity present.
- To the other cell add a nitrate No.1 tablet. Crush with a clean stirring rod and mix thoroughly to dissolve. Allow standing for 30seconds.
- Add a nitrate No.2 tablet to the cell and crush carefully. Replace the cap and shake the cell for exactly 30seconds and then allow to stand for 3 minutes. Do not remove the cap.
- Place the cell in the right-hand compartment of the comparator and match the color against the disc by placing the comparator facing North Daylight and rotating the disc until the nearest color match is obtained.
- Read off the result in mg/l of nitrate as NO3 in the bottom right-hand corner of the comparator.
Water Analysis 2, DISSOLVED OXYGEN: Range 4.0-12.0mg/l using disc 3/3 [ Water Analysis 2 ]
- Rinse out the stoppered sampling bottle with the water to be tested and fill to overflowing.
- Insert the stopper and then remove it. This leaves the water at the correct level in the bottle.
- Add 5 drops of dissolved oxygen reagent 1.
- Therefore, add 5 drops of dissolved oxygen reagent 2.
- Stopper the bottle carefully and invert rapidly several times, making sure the stopper is held in place, to ensure thorough mixing of the contents.
- Allow to stand for 5 minutes. A brownish flocculant precipitate should settle out.
- Remove the stopper and quickly add three spoonfuls of dissolved oxygen reagent 3. Replace the stopper and shake the bottle thoroughly until a clear yellow solution is given.
- Fit disc 3/3 into the comparator and place a 13.5mm/10ml molded cell containing an untreated water sample in the left-hand compartment.
- Pour about 10ml of the treated sample into a 13.5mm/10ml cell and place it in the right-hand compartment of the comparator. Match against the disc by holding the comparator facing North Daylight and rotate the disc until the nearest color match is obtained.
- The figure shown in the bottom right-hand corner of the comparator represents milligrams per liter of dissolved oxygen in the sample.
- If the color produced is deeper than the top step on the disc (i.e greater than 12mg/l), measure 5ml of the treated sample into the 10ml cell, add one potassium iodide tablet, and few grains of reagent 3 mixes to dissolve. Makeup to the 10ml mark with untreated water and match the color against the disc. Multiply the reading by two to give the true concentration.
Water Analysis 2, pH: Range 2.8 – 4.4 using disc 2/1B, Range 4.0 – 8.0 using disc 2/1CC, Range 7.6 – 9.2 using disc 2/1Z
- 1.Fit the required pH disc into the comparator.
- Fill two 13.5mm/10ml molded cells to the mark with the sample to be tested and place one cell in the left-hand compartment of the comparator.
- To the other cell add the appropriate pH tablet (i.e Bromothymol Blue for disc 2/1B and M-cresol purple for disc 2/1Z). For disc 2/1CC, then add 0.5ml of 4080 indicator solution instead of a tablet. Crush the tablets as appropriate and mix to dissolve with a clean stirring rod.
- Place the cell in the right-hand compartment of the comparator, then match by holding the comparator facing North Daylight and rotating the disc until the nearest color match is obtained.
- The pH value of the solution is shown in the bottom right-hand corner of the comparator.
Water Analysis 2, AMMONIA (NH3): Range 0-1.0mg/l as N (higher range by dilution) using disc 3/113 [ Water Analysis 2 ]
- Fit the disc into the comparator.
- In other words, pour sample into two 13.5mm/10ml molded cells to the 10ml mark, then fit one cell in the left-hand compartment of the comparator.
- To the other cell add one Ammonia No.1 tablet, crush and mix to dissolve. Next add one Ammonia No. 2 tablet, crush, however continue mixing until both tablets are dissolved. At the right-hand compartment of the comparator fit the cell and stand for 10minutes.
- After standing for the required time, match the color against the disc by holding the comparator facing North Daylight and therefore rotating the disc until the nearest color match is obtained.
- The figure shown in the bottom right-hand corner of the comparator is the concentration of Ammonia as N in mg/l in the sample.
- For concentrations of Ammonia higher than 1mg/l the sample may be diluted with Ammonia-free deionized water, the test repeated , in conclusion the resulting reading multiplied by the dilution factor.