This guide will teach you how to install WordPress on a VPS server in about 2 minutes. Yeah, it’s that simple and quick!
The WordPress installation procedure is easy, requiring only a few basic steps. Nevertheless, installing WordPress on a VPS may be difficult since you will require some technical skills.
Don’t worry; I’ll lead you through everything step by step. Well, let’s get this party started!
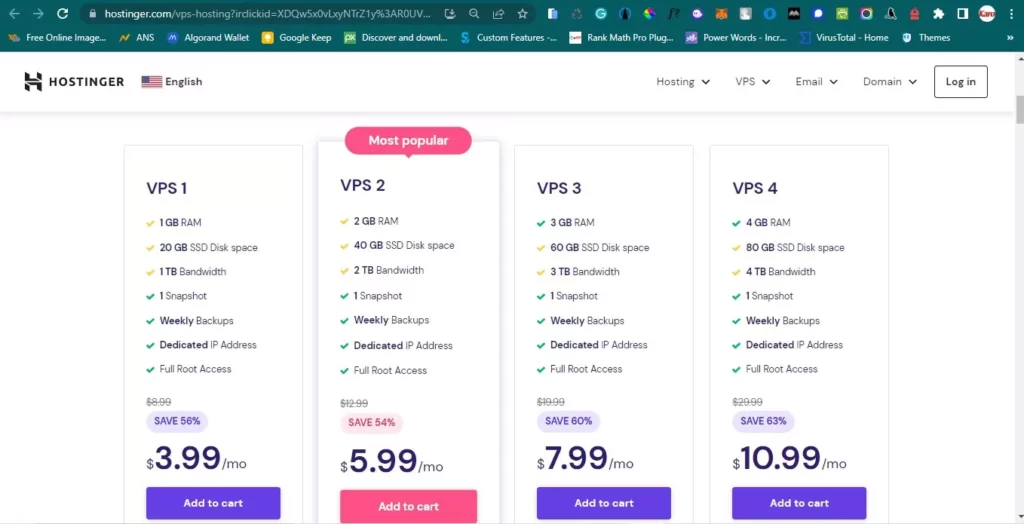
Step 1: Get the Best VPS
Sign up for a VPS hosting service with a reputable provider like Hostinger or Namecheap.
Here are some pointers for selecting the finest VPS hosting provider in 2023:
- Compare the pricing of various suppliers.
- Select the cheapest choice, especially if you’re just starting out.
- Check if the VPS supplier provides outstanding customer service.
- Look through other users’ reviews to get a sense of the service’s quality.
- Once you’ve decided on a provider, create an account and begin a VPS.
- I would suggest utilizing a Linux-based VPS because it is more stable and safe. Furthermore, Plesk server data center automation software is the most affordable and user-friendly alternative.
Step 2: Directly link your domain name to your VPS IP address.
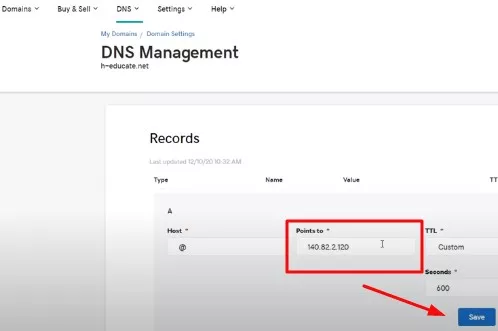
In order to access your WordPress site, you must use a domain name rather than your VPS IP address. To achieve this, you must first point your domain name to the server IP address.
- Copy the VPS IP address.
- Visit your domain registrar.
- Have a look at your domain name’s DNS records.
- Modify the A records and save the changes.
Install WordPress on Your VPS Server in Step 3
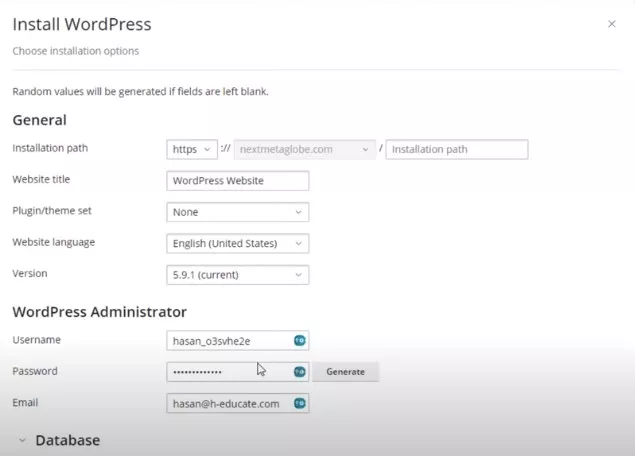
This step will teach you how to use Plesk to install WordPress on your VPS server. The method may alter significantly if you use a different automation tool such as Softaculous. So don’t worry, it’s still simple and uncomplicated!
- Take note of the Plesk login URL provided in the email.
- To access your Plesk account, enter your login information.
- Add the domain name by clicking ‘Websites & Domains’.
- And then select ‘Install WordPress’ from the Dev Tools menu.
- Enter your WordPress dashboard username and password.
- You’re done when you click the install button.
And congratulations on successfully installing WordPress on your VPS server.
Step 4: Install an SSL Certificate on Your WordPress Website
An SSL certificate is required to build a secure website. It encrypts the connection between your server and the visitor’s browser, making data interception impossible.
It also helps to develop trust with your audience by demonstrating that you take security seriously. Fortunately, installing an SSL certificate on your WordPress site is simple.
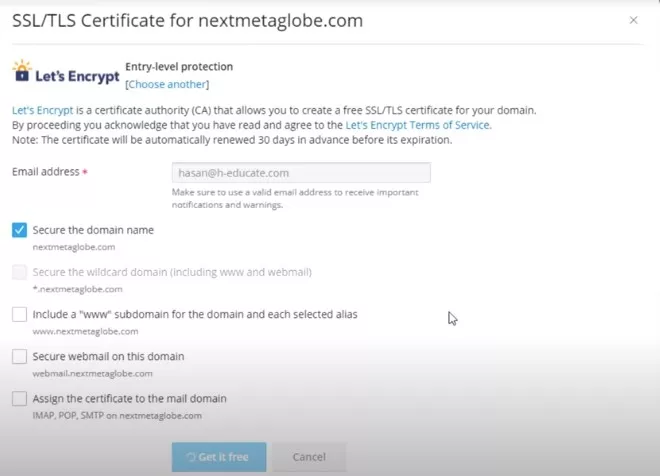
To begin, use Let’s Encrypt to generate a free SSL certificate. On your Plesk dashboard, navigate to ‘Websites & Domains’ and then click on SSL/TLS Certificates. Click the ‘Add Certificate’ button, then choose ‘Let’s Encrypt’ from the drop-down option before clicking the ‘Get it free’ button.
FAQs on WordPress Installation on a VPS Server (2022)
How do I set up WordPress on a virtual private server (VPS)?
After purchasing your preferred VPS hosting provider, follow the step-by-step instructions in this guide. This normally entails entering your server with a secure login and password, configuring domain management software, and installing WordPress.
How can I get to my WordPress files or content on a VPS?
You must use an FTP client such as Filezilla or Cyberduck to access your WordPress site files on a VPS. Then, using the FTP credentials provided by your hosting provider, log onto your server.
How can I install WordPress without a domain name on a VPS?
Setting up a temporary subdomain is the simplest way to install WordPress on your VPS server if you don’t have a domain name.
In the WordPress installation wizard, for example, enter ‘yourvpsname.webhostingpanel.com’. Just replace it with your actual domain name once you’ve acquired one. Follow this instruction for additional information right now.
How do I install WordPress on a cPanel-based VPS?
If you have a VPS with cPanel, installing WordPress is a breeze. Go into your cPanel dashboard and proceed as follows:
1. Go to the ‘Software’ area.
2. ‘Softaculous Applications, Installer’ should be selected.
3. Enter ‘WordPress’ in the search field.
4. Choose the ‘Install’ option.
To finish the installation, follow the on-screen directions. That’s it – WordPress is now installed on your VPS host!
Impact-Site-Verification: 1094529866
